This guide aims to show you how you can establish a basic Shih Tzu home-grooming routine, as well as provide some advanced tips for owners wanting to get more hands on with the grooming process or amateur stylists looking for more input and ideas.
Basic Shih Tzu Maintenance
Here is a basic routine for owners to follow in between grooming or for groomers to do at the beginning of a session.
Nails
Aim to trim or grind the nails every four to six weeks.
While it can be intimidating if you’ve never done it before, maintaining the nails is very important for the dog's overall foot structure.
Ear Hygiene
Shih tzu ears should be cleaned fairly regularly given that ear infections can be common.
See here for detailed instructions
Mat and tangle check
Go over the body with a comb and feel for any slight knots, try and gently pull them apart with your fingers if you can..
Matted hair will require a bit more effort to deal with so take note of any problem areas and move onto them after giving the dog a bath.
Bathing and drying
Bathing a Shih Tzu should be done once every 12 or so weeks depending on the length of the coat.
Shih Tzus with long coats, breed standard for example, will need more attention both in terms of brushing and bathing.
Puppies may also need to bathed more often as they can be prone to soiling their behinds.
It’s important to maintain a balance though, bathing too often for example, can remove essential oils which can cause dry skin and other skin related issues.
Here’s a great video from Go Groomer demonstrating how bathing a shih tzu puppy should be done.
Amy Leigh places a lot of emphasis on building trust and understanding when bathing and grooming a young dog.
If you prefer an in-depth written guide or need more information have a look at this wikihow article on bathing a shih tzu puppy.
Drying
Once the bath is complete pat the dog dry (don't rub) with a towel. Once the coat is in a semi-dry state and not dripping, move on to blow drying.
Using a standing dryer is much easier as it gives you both hands free. This may be possible to achieve with a standard hair dryer if you can position it somewhere close by, on a shelf for example.
Keep the temperature on cool using the lowest wind setting as the noise can be quite scary.
Use one hand to secure the dog and make them feel comfortable, and the other to gently comb through the fur.
As Amy mentions in the video, try and make sure the dog is standing up as much as possible. This may be challenging in the beginning so be patient.
Brushing and combing
Using a slicker brush, softly pat the coat with the pad of the brush and pull out and away with each stroke in a light and gentle motion.
Start with the lower rear legs working up towards the thigh area. Once you’ve done the legs move on to the body, followed by the neck, head, ears and tail.
Follow the seam line as you brush a small amount of fur with each stroke, after brushing a section be sure to check things using the comb.

As you work, it may be necessary to use your hands to check the density of that coat, anywhere that feels thicker will likely need special attention with the brush. If you notice any static electricity lightly mist the coat with an anti-static electricity product or water as you brush.
Only move on to the next section once the brush moves smoothly through the fur and the skin at the seam line is visible.
The end result should be as such that each strand of hair floats freely with the dog’s movement.
If the body coat is left to grow long (not clipper trimmed), daily combing and brushing is an absolute must to prevent matting.
Brushing the face
Use the narrow teeth comb and gently run it through the moustache area being aware of potential knots as you comb, you don’t want to tug on your dog’s face by accident!
Especially in key areas where the fur is longer, i.e. the ears, sides of the face, and the tail.
If you do come across a relatively knotted area it’s best if you can hold the knot at its base between your fingers or whatever else you can to take the pressure as you comb the hair through. Repeat this process on the ears.
When should I start grooming my Shih Tzu?
As puppies, Shih Tzus, do not actually need to be groomed that much, some say a quick brush once every 3 days is fine. Additionally, it may be beneficial to allow your dog to become accustomed to the feel of the brush and the idea of grooming at an early age, around 8-9 months.
At the age of around 1 year, most Shih Tzu dogs will have grown a longer adult coat, at which time you will want to start doing more detailed and thorough grooming.
How often should a Shih Tzu be groomed?
As a full routine, maintenance should be done at least every 3 weeks. So that’s brushing, bath, untangling of knots, finally some cleaning and trimming.
Brushing on its own, however, is something you should really do every day depending on the length of your dog’s coat.
Shih Tzu styling
Providing you have completed the above section you may now move on to styling the Shih Tzu.
While the breed grooming standard for a Shih Tzu is to leave the coat long and flowing. This takes a lot of work to main and is usually not practical for the typical family pet.
With that in mind, we will first go over a breed-standard Shih Tzu groom followed by a clipper-trim (the go-to option for most family pets).
Keep in mind there are many styles that suit Shih Tzus so feel free to mix it up a bit.
Breed standard

Source: American Kennel Club
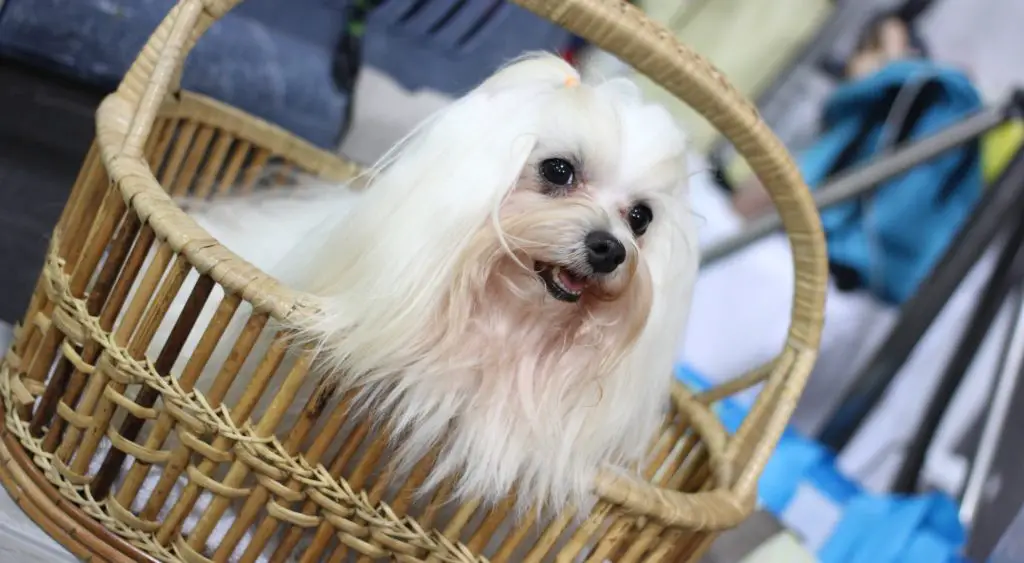
The American Kennel Club standard for the Shih Tzu coat is described as "luxurious, double-coated, dense, long, and flowing", with the only trimming allowed being on the feet, bottom of the coat and anus for "neatness and to facilitate movement".
Hair on the top of the head should be tied up.
With that in mind, there really isn't going to be much trimming. Mostly a heck of a lot of brushing and tidying up.
Feet
Using a blade ranging from a #15 to #40 lightly touch the pads to trim away any long hairs. You may need to brush the pad to make any small strands between the toes stand up for the clipper.
Next create a rounded foot by first blocking in the foot to create a square. Then, work around the foot with your curved shears removing any hard edges.
The video below does a good job of demonstrating this process.
Trimming & thinning
Using thinning or straight shears go over the outline of the Shih Tzu and remove any stray, out of place hairs that distract from a smooth flow.
The end result should be a sleek yet natural appearance. You may wish to lightly mist the coat with a spray polish to make it shine.
Clipper-trim (round head)
The breed standard grooming for Shih Tzu insists that the coat is left long and flowing, however, considering the amount of upkeep and maintenance this requires, a clipper-trim may be more suitable.
A clipper trim may also be required if the coat is matted and you are left with no other alternative but to start from scratch.
The body
Starting at the base of the occiput (back of the skull), work down the spine towards the tail and over the rump following the direction of the fur and natural contours of the dog.
Each stroke of the clipper should slightly overlap the previous stroke.
Do a complete once over then, if using a #4F, #5F or #7F blade, back brush to set the coat up for a second pass.
If you’re using a medium to longer guard comb you may need to do a body roll to make the coat stand up.
Blending areas
If you’re working with a shorter guard comb switch to a medium or longer guard for the blending areas. Blend the top of the front and rear legs and go over the rump cutting in the angulation.
For the front legs, move the clipper in a way that lets it “drop off” at the widest point of the shoulder in a skimming fashion over the top of the leg to achieve a smooth transition between the shorter, clipped body coat and the longer, scissored leg.
Avoid clipping too quickly as this can create tracking, instead maintain a consistent and steady pace to allow the coat to properly feed into the teeth of the blade. As you work, hold the clipper at the same or similar angle to ensure a smooth and seamless transition between the target areas.
Front legs
After blending is done there shouldn’t be much left to hand-scissor. To get a better idea take a look at the legs from the front and ensure they form straight parallel lines from the widest part of the shoulder.
Rear legs
Looking from the side, identify and remove any excess hair over the hip and thigh using longer guard combs. Using shears, thinning or regular, trim any stray hairs. From behind, the legs should form straight and parallel lines.
Tidy up the hocks to make them straight and further round the feet with curved shears as required.
Head and face (no top knot)
Comb the top hair forward, hold between fingers and trim the excess according to the desired length. It is generally easier to do this in 2-3 sections starting at the back going forward.
Round the top of the head off using curved shears to trim stray hairs and create shape.
Using thinning shears, remove excess bulk from the sides of the face moving in towards the top of the muzzle, being careful around the eyes. Go over the sides of the face with straight or curved scissors to tidy up any stray hairs.
Again with thinning shears, address the front of the muzzle and buffer into soft neat lines.
Remove bulk from under the chin back towards the top of the throat using thinning shears.
Ears
There are a few ear styles that suit a round head. If you’re going for a puppy look, a shorter ear trim is a good choice.
Shaved or teddy ears
Using a #10 or #15 blade, work across the ear leather starting in the center moving towards the edges, holding and supporting the ear with your fingers while doing so.
Be sure to keep the blade at a right angle to the outside edge of the ear leather or else you could end up nicking the ear.
For the inside part of the ear and around the ear canal use a #40 blade. Finish the edge work with small detailing shears.
Long ears
The ears can be left in their natural state though you may wish to trim slightly with shears to tidy things up.
Tail
The tail may be left long and in its natural state or trimmed to create a number of different looks, here are a couple you could try.
Lion
This is easy to achieve but looks super eye-catching, especially when paired with a “big head” to complete the lion style.
Clip the tail to around a third to two-thirds of the base of the tailbone using the same number blade as you used for the body, then leave the rest natural or tidy up slightly with shears to create a plume.
Plumed
Gently grasp the tail and run your hand down keeping it together and stopping at the desired length. Take the excess between your fingers and trim with shears. (blunt cut)
Next, brush the tail and hold it up horizontally. Allow the longer coat of the tail to drape down and brush it to neaten up the curtain.
With thinning or straight shears, cut a few V shapes parallel to the hanging strands of hair. These V-shaped cuts can be between 1 and 3 inches deep depending on how much length you wish to remove.
Topknots
As well as completing the classic Shih Tzu’s look (boy or girl), topknots actually serve to keep longer hairs on the face out of the way when eating and drinking.
Damp hair can be difficult to spot but encourages the growth of red yeast which can lead to staining. Therefore it’s important, both for appearance and hygiene, that you learn to tie up the hair.
But first, a note on safety.
There are a lot of topknot bows to choose from out there, some of them are made from cheaper materials.
Look for a bow that is latex-free and that does not contain any wire framing. Also, be careful with barrettes as they can be a choking hazard if your dog chews things.
How to tie a topknot
Start with a clean and combed face.
Locate the stop (between the eyes) and make a part, combing down to the left and right respectively.
Comb the rest of the hair back, taking care not to pull on the dog’s eyes.
Now take a small section of the combed back hair and gather into a bunch, combing back any loose strands to create a neat bunch.
Using a snag-free elastic band, secure the hair by wrapping the band around 2 or 3 times (depending on the size of elastic band).
Once the hair is secured pull a few strands down to loosen the top knot so it's not pulling on the dog’s eyes too tightly.
Repeat this process on the section of hair just behind the first top knot to create a second top knot.
Take an adequately sized bow and place over the first top knot, positioning the elastic band of the bow just below the elastic band used to tie the top knot.
Finally, take another elastic band and tie both top knots together, positioning the band just above the elastic band of the bow to lock it in place.